3.3.2 Hillshade
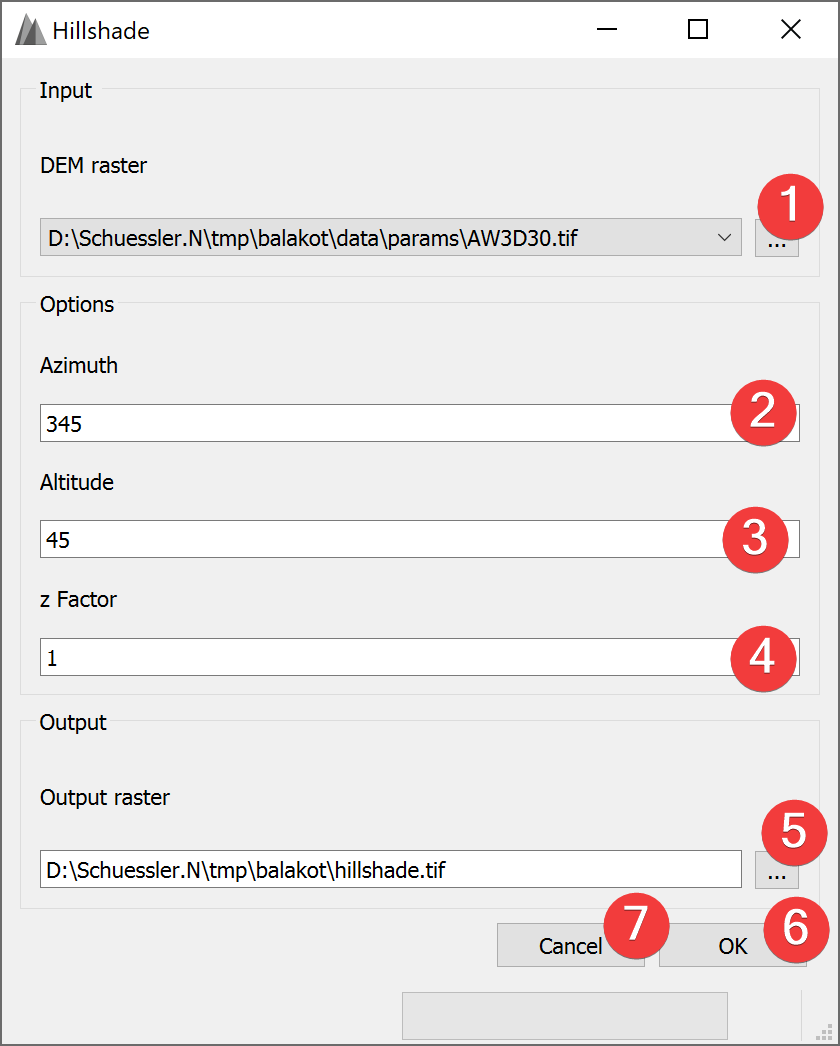
Fig. 3.9 Hillshade Widget
The hillshade widget creates a new raster based on the calculated hillshade from an input DEM raster.
3.3.2.1 Usage
- Select the input DEM raster. You can either select from imported rasters using the Inputcombo box or select one from your PC (1).
Select the Azimuth (2) (Default: 345).
Select the Altitude (3) (Default: 45).
Select the z Factor (4) (Default: 1).
- Select the output hillshade raster location. You can either type in the absolute file pathyourself or pick one with a dialog (5).
Start the calculation (6)
If you want to use the created hillshade raster in your LSAT Project you need to import it using the Import Raster Widget.
Azimuth defines the location the light is shining from in degrees (0-360).
Altitude defines the altitude the light is shining from in degrees (0-90).
z factor exaggerates the DEMs height.
Clicking on Cancel (7) closes the widget.
3.3.2.2 Input and Output
Input |
Digital Elevation Model raster dataset (.tif) |
Output |
Hillshade raster dataset (.tif) |